Optimize AI generated 3D Models for the Web
![Written by [object Object]](https://a.storyblok.com/f/316774/320x320/e07f300c40/kevinkernegger.jpg)
By Kevin Kern
In this blog post, I’ll walk you through step-by-step how to optimize your GLTF model in Blender, so your game runs faster, smoother, and without unnecessary lag. Let’s get started!
1. Getting Started
Check the File Size of your model

Import Model

Blender Shading Modes
Switch between different shading modes (It takes some time to load - wait 1minute if the textures are not loading)
2. Optimize Model
Merge by Distance
This tool removes duplicate or unnecessary vertices that are very close to each other, optimizing your model for better performance.
How to use it:
Enter Edit Mode (
Tab).Select all vertices (
A).Press
M→ Choose Merge by Distance.In the bottom-left operator panel, you can adjust the Distance Threshold (keep it small, like
0.0001to0.001).
Why do it?
Removes excess geometry from model imports.
Cleans up artifacts from decimation.
Reduces file size without affecting the shape.


Optimize Textures
The model has a texture applied which we can inspect and check its size.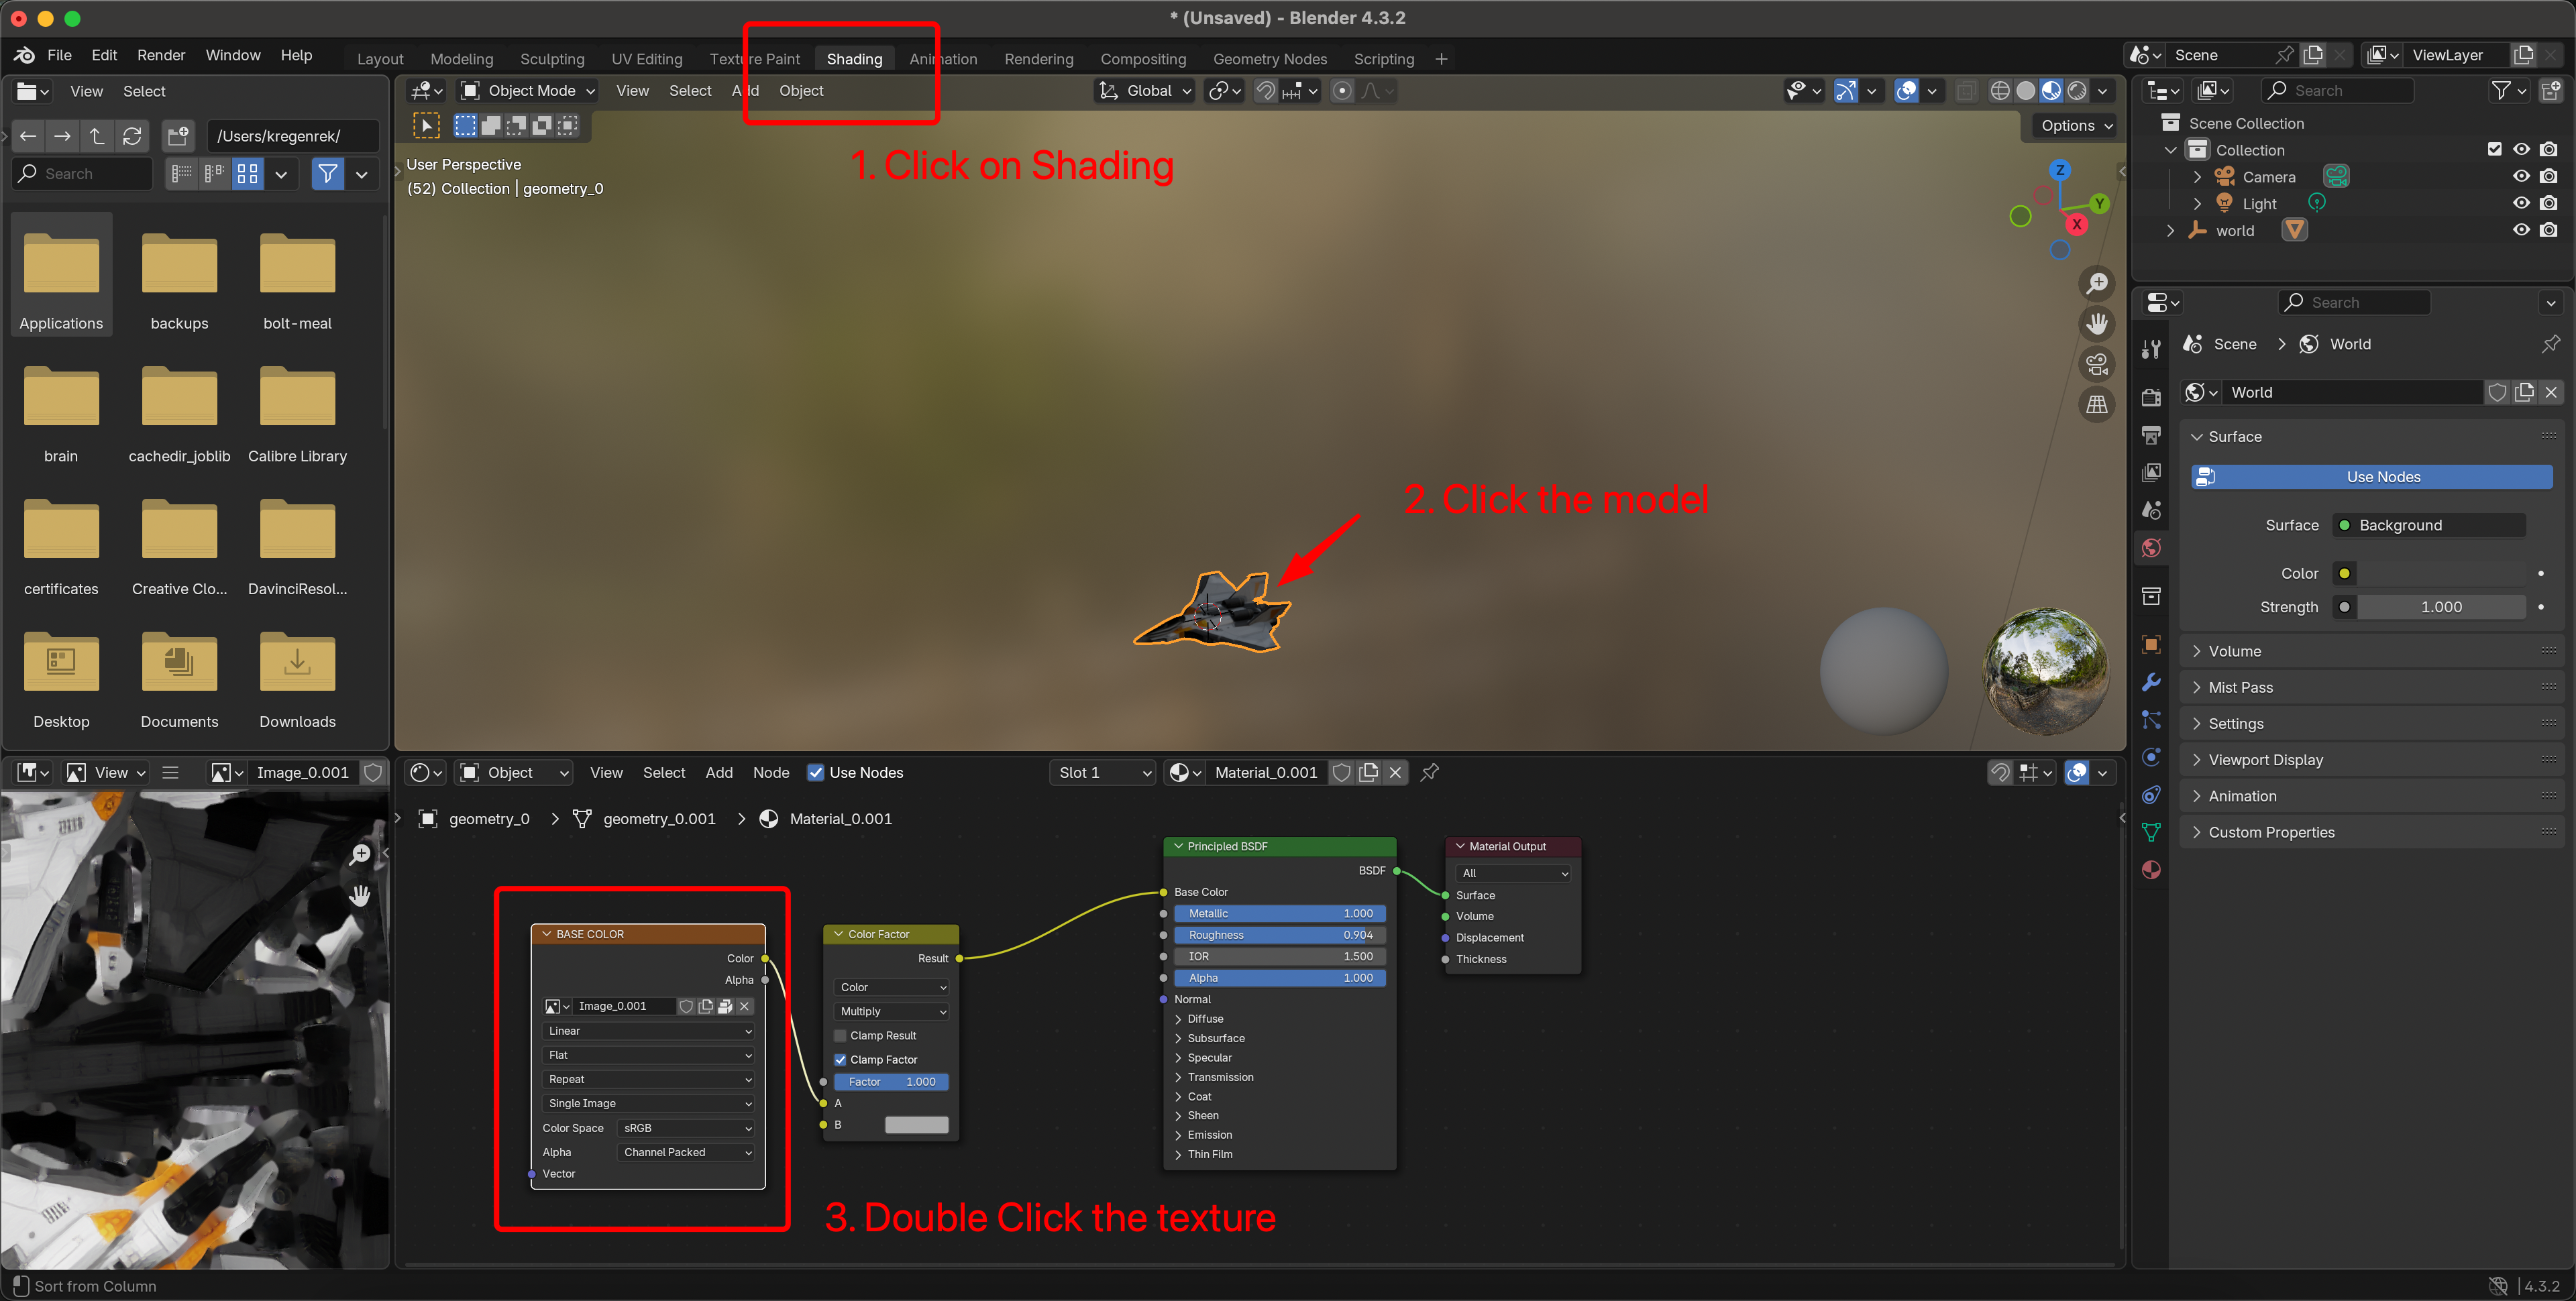

After Saving the file check its size. And you can see that the texture has 1.4MB
Compress the image
Go to tinypng.com and upload your texture.
Now compress it and download it again

You have now 2 files. Call the new texture file _opt.png so its clear which one is the compressed image.
Now lets replace the new texture with the old one
Choose the optimized image we’re done
Optional: UV Edit
If the texture looks incorrect:
Go to the UV Editing tab.
Select the model and check if the UV map aligns with the new texture.
Adjust if needed.

Reduce Polygon Count
Select your model → Go to Modifier Properties → Add Decimate modifier.
Adjust the
Ratio(start around 0.5 or lower).Click Apply when satisfied.


Now lower the polygon count without significantly losing shape detail. (Around 0.2 - 0.5)
 Important: If you’re finished you need to Apply!!! the changes (CMD + A) or click apply.
Fix Normals (Optional)
You can skip this step. It help if you discover some issues with the model.
Check Normals (Fix Inside-Out Faces)
Normals define which direction each face is pointing. If they're flipped, your model may render incorrectly (e.g., dark spots or missing faces).
How to fix normals:
In Edit Mode, select all (
A).Press
Shift + Nto Recalculate Normals.If some faces still appear wrong:
Go to Overlays (top-right) → Enable Face Orientation.
Blue = correct, Red = flipped.
Manually flip bad faces: Select a face → Press
Alt + N→ Flip.
Why do it?
Prevents rendering issues in Blender and game engines.
Ensures proper lighting and shading.
Fixes broken shading after decimation or import.
3. Export
Now lets export our model file as “.glb” file


Testing & Validation
 Validate with gltf.report
Optimize further using glTF Transform
Access it here
Access the Viber3D modern starter kit for 3D browser games here.

Other interesting posts:
Have a look at my other interesting blogs:
Happy coding!
Join Instructa Pro today
Faster Project Launches
Boost your income - AI is high demand
Join a Supportive Community
Get Simple, Step-by-Step Guidance
